
Yes, you read it right. You would not believe but there are more people who don’t know than know how to tie a simple tie knot. It is important that every man, at least, knows their knots. There are a number of types of tie knots used around the world. And each one has some significance. It is widely believed in the fashion world that a tie knot could say a lot about the personality of a person. Well, yes. Who is going to think that you are a great person to do business with if you are wearing your tie knot all wrong? It’s that simple.
It is great if you know a couple of tie knots that can be used on different occasions rather than wearing the same thing every day. Here, we will be looking into some famous tie knots with a step-by-step guide and informative illustrations.
The most widely used tie knot is the simple knot or the oriental knot. Other than that, here are some other ways of tying your tie knot;
Types of Tie Knots
- Four In Hand Knot
- Half Windsor Knot
- Full Windsor Knot
- Nicky Knot
- Bow Tie Knot
- Kelvin Knot
- Pratt Knot
- St. Andrew Knot
- Balthus Knot
- Hanover Knot
- Plattsburgh Knot
- Grantchester Knot and etc.
Now, let’s look into five of those styles in detail. Of the types of tie knots first, the simplest of them all.
The Simple/Oriental Knot
Your tie should be draped around the collar, seam-inwards, thick end to the left and placed 2 / 3 inches lower than the finishing spot.
Then bring the thick end across the front of the narrow end and pass it back behind it, both horizontally.
Then pass it again across the front of the know from left to right and then behind the knot from right to left and then again in front of the knot. This time from left to right.
Put your finger under this loop.
Hold the tip of the think end, bring it up from behind the knot and put it under the third loop and pull it down. Now, you should be able to adjust it by holding the knot from one hand and pulling the narrow end gently.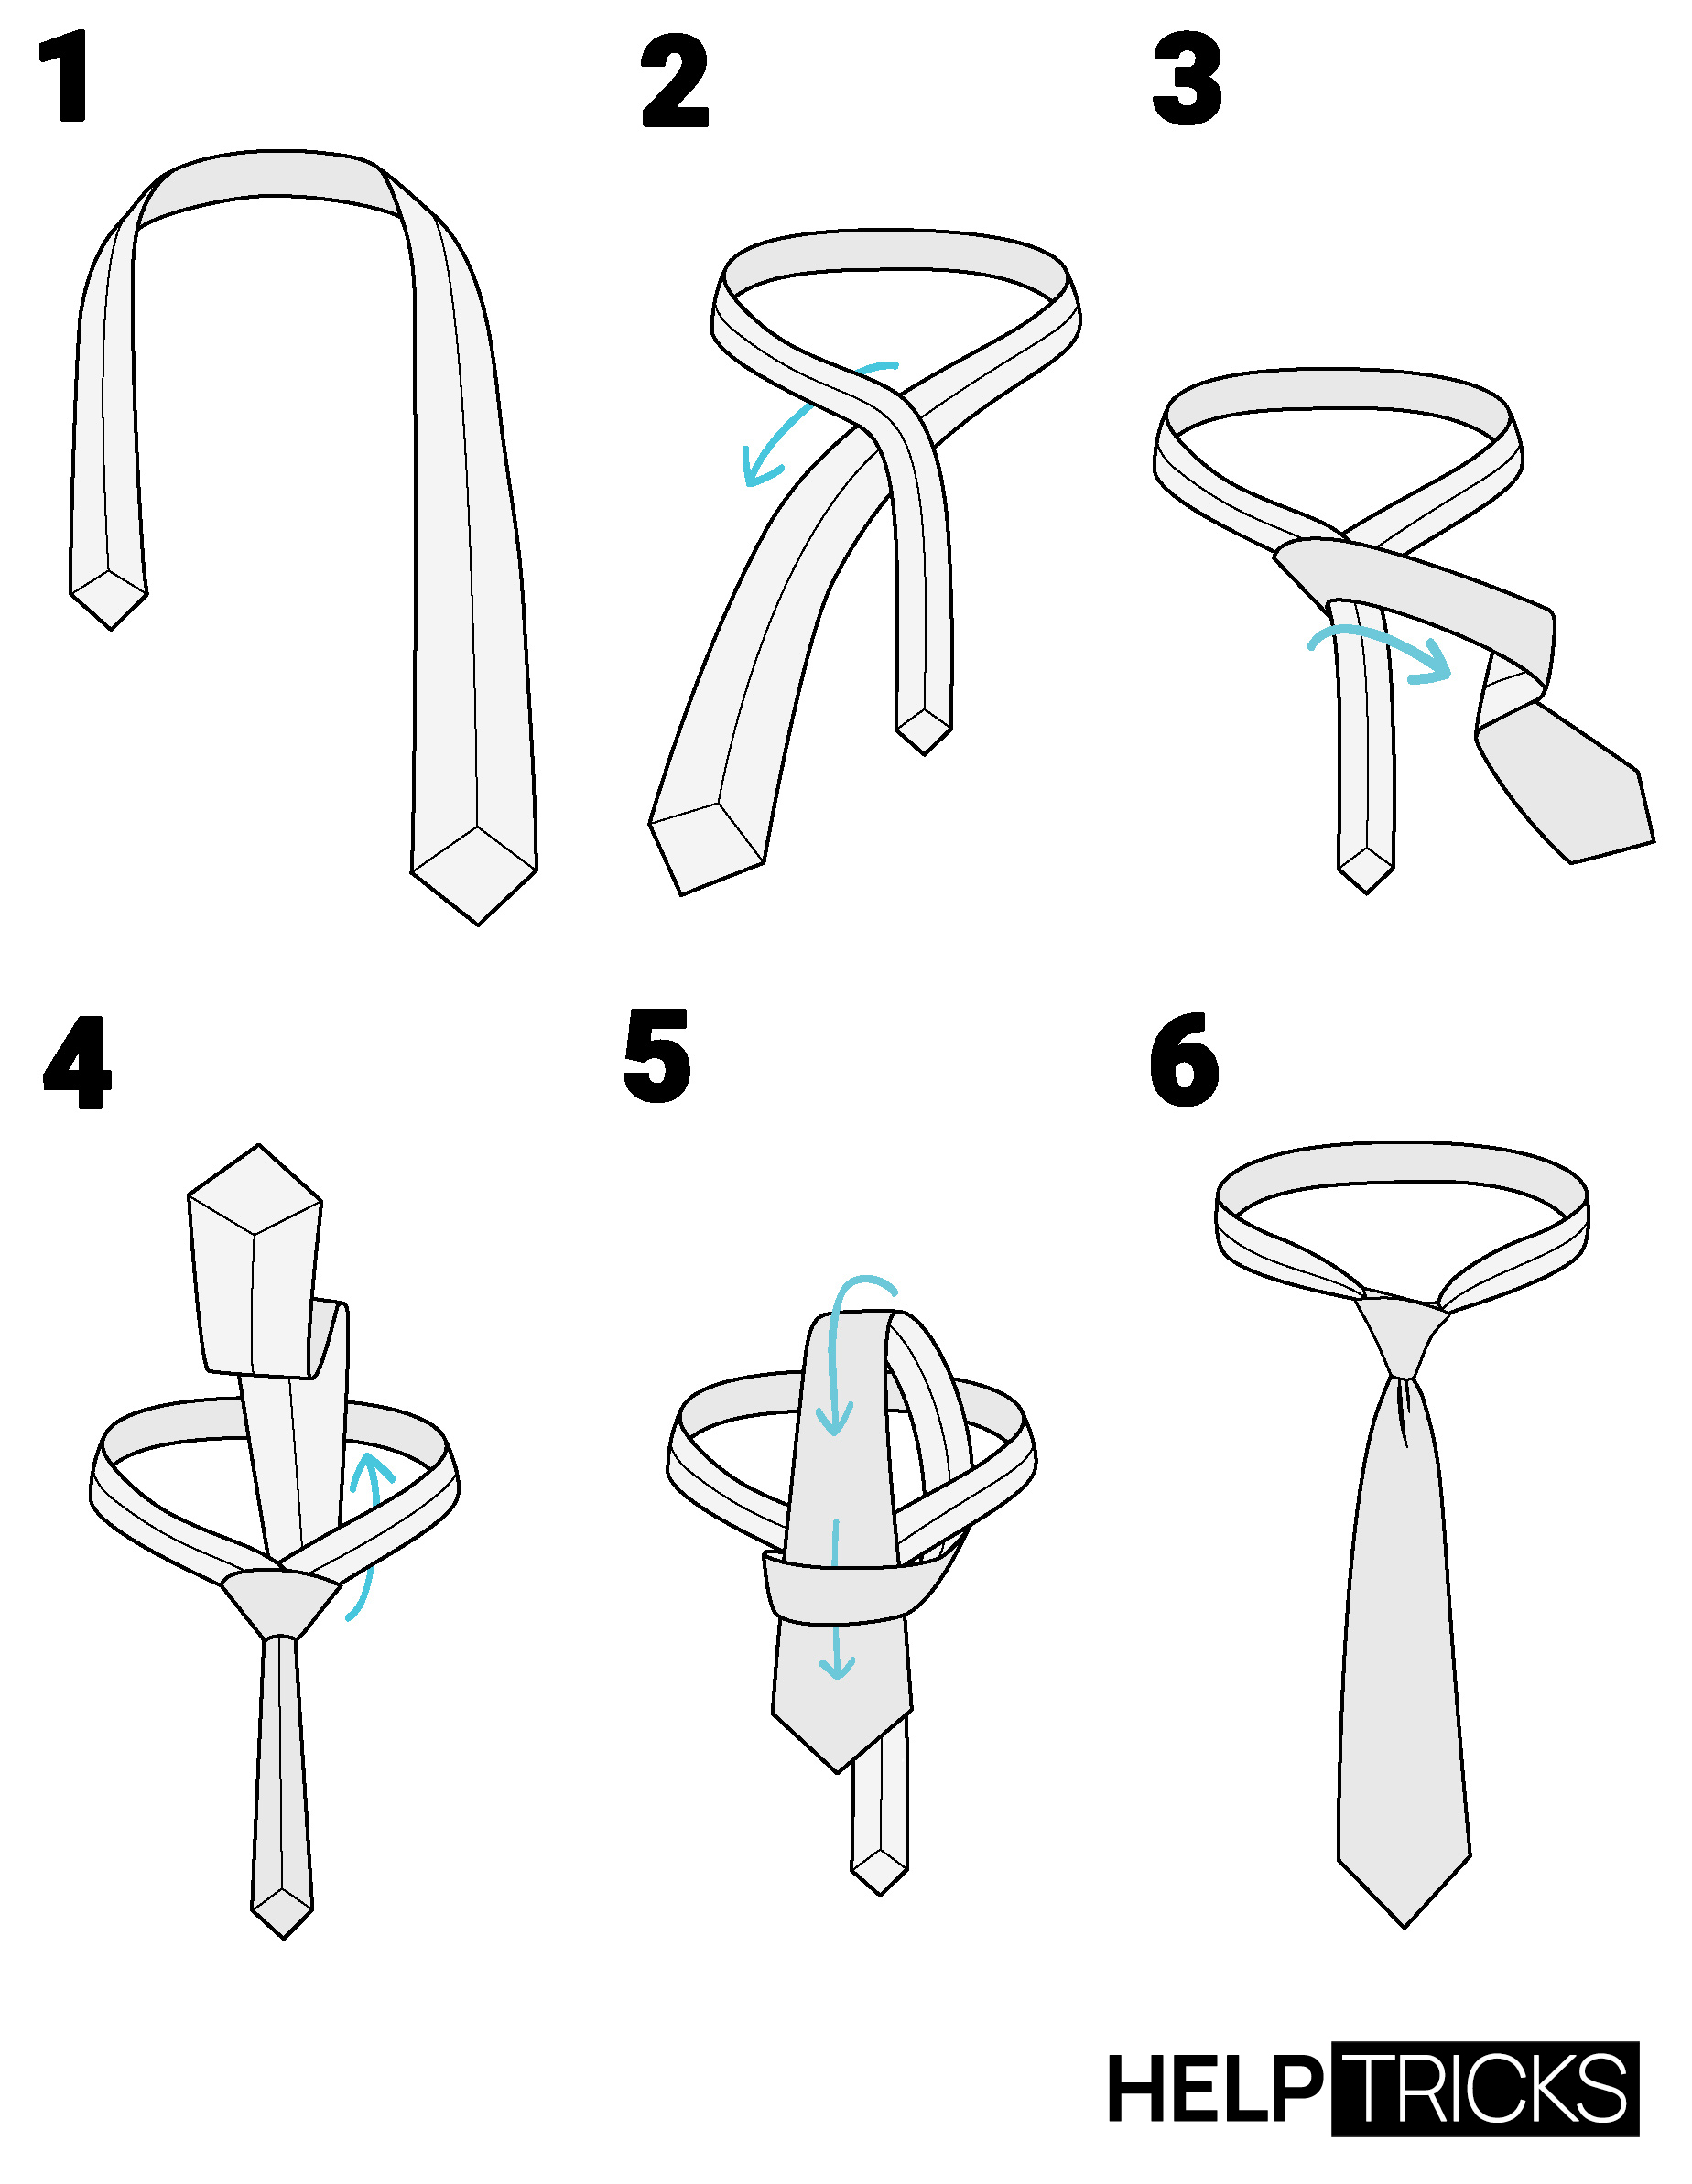
Four In Hand Knot
The first step is to wrap the tie around the collar, thick end to the left of yours hanging 3 / 4 inches lower than the narrow end. And cross the thick end in front of the narrow end.
Then put the thick end behind the narrow end and again put it behind horizontally from right to left and do it once more.
Put your finger behind the second horizontal band and turn the thick end upward and put it through the loop (which you’ve been holding with your finger). Pull the thick end enough to make a tight knot. You can do it by gently pulling on the narrow end.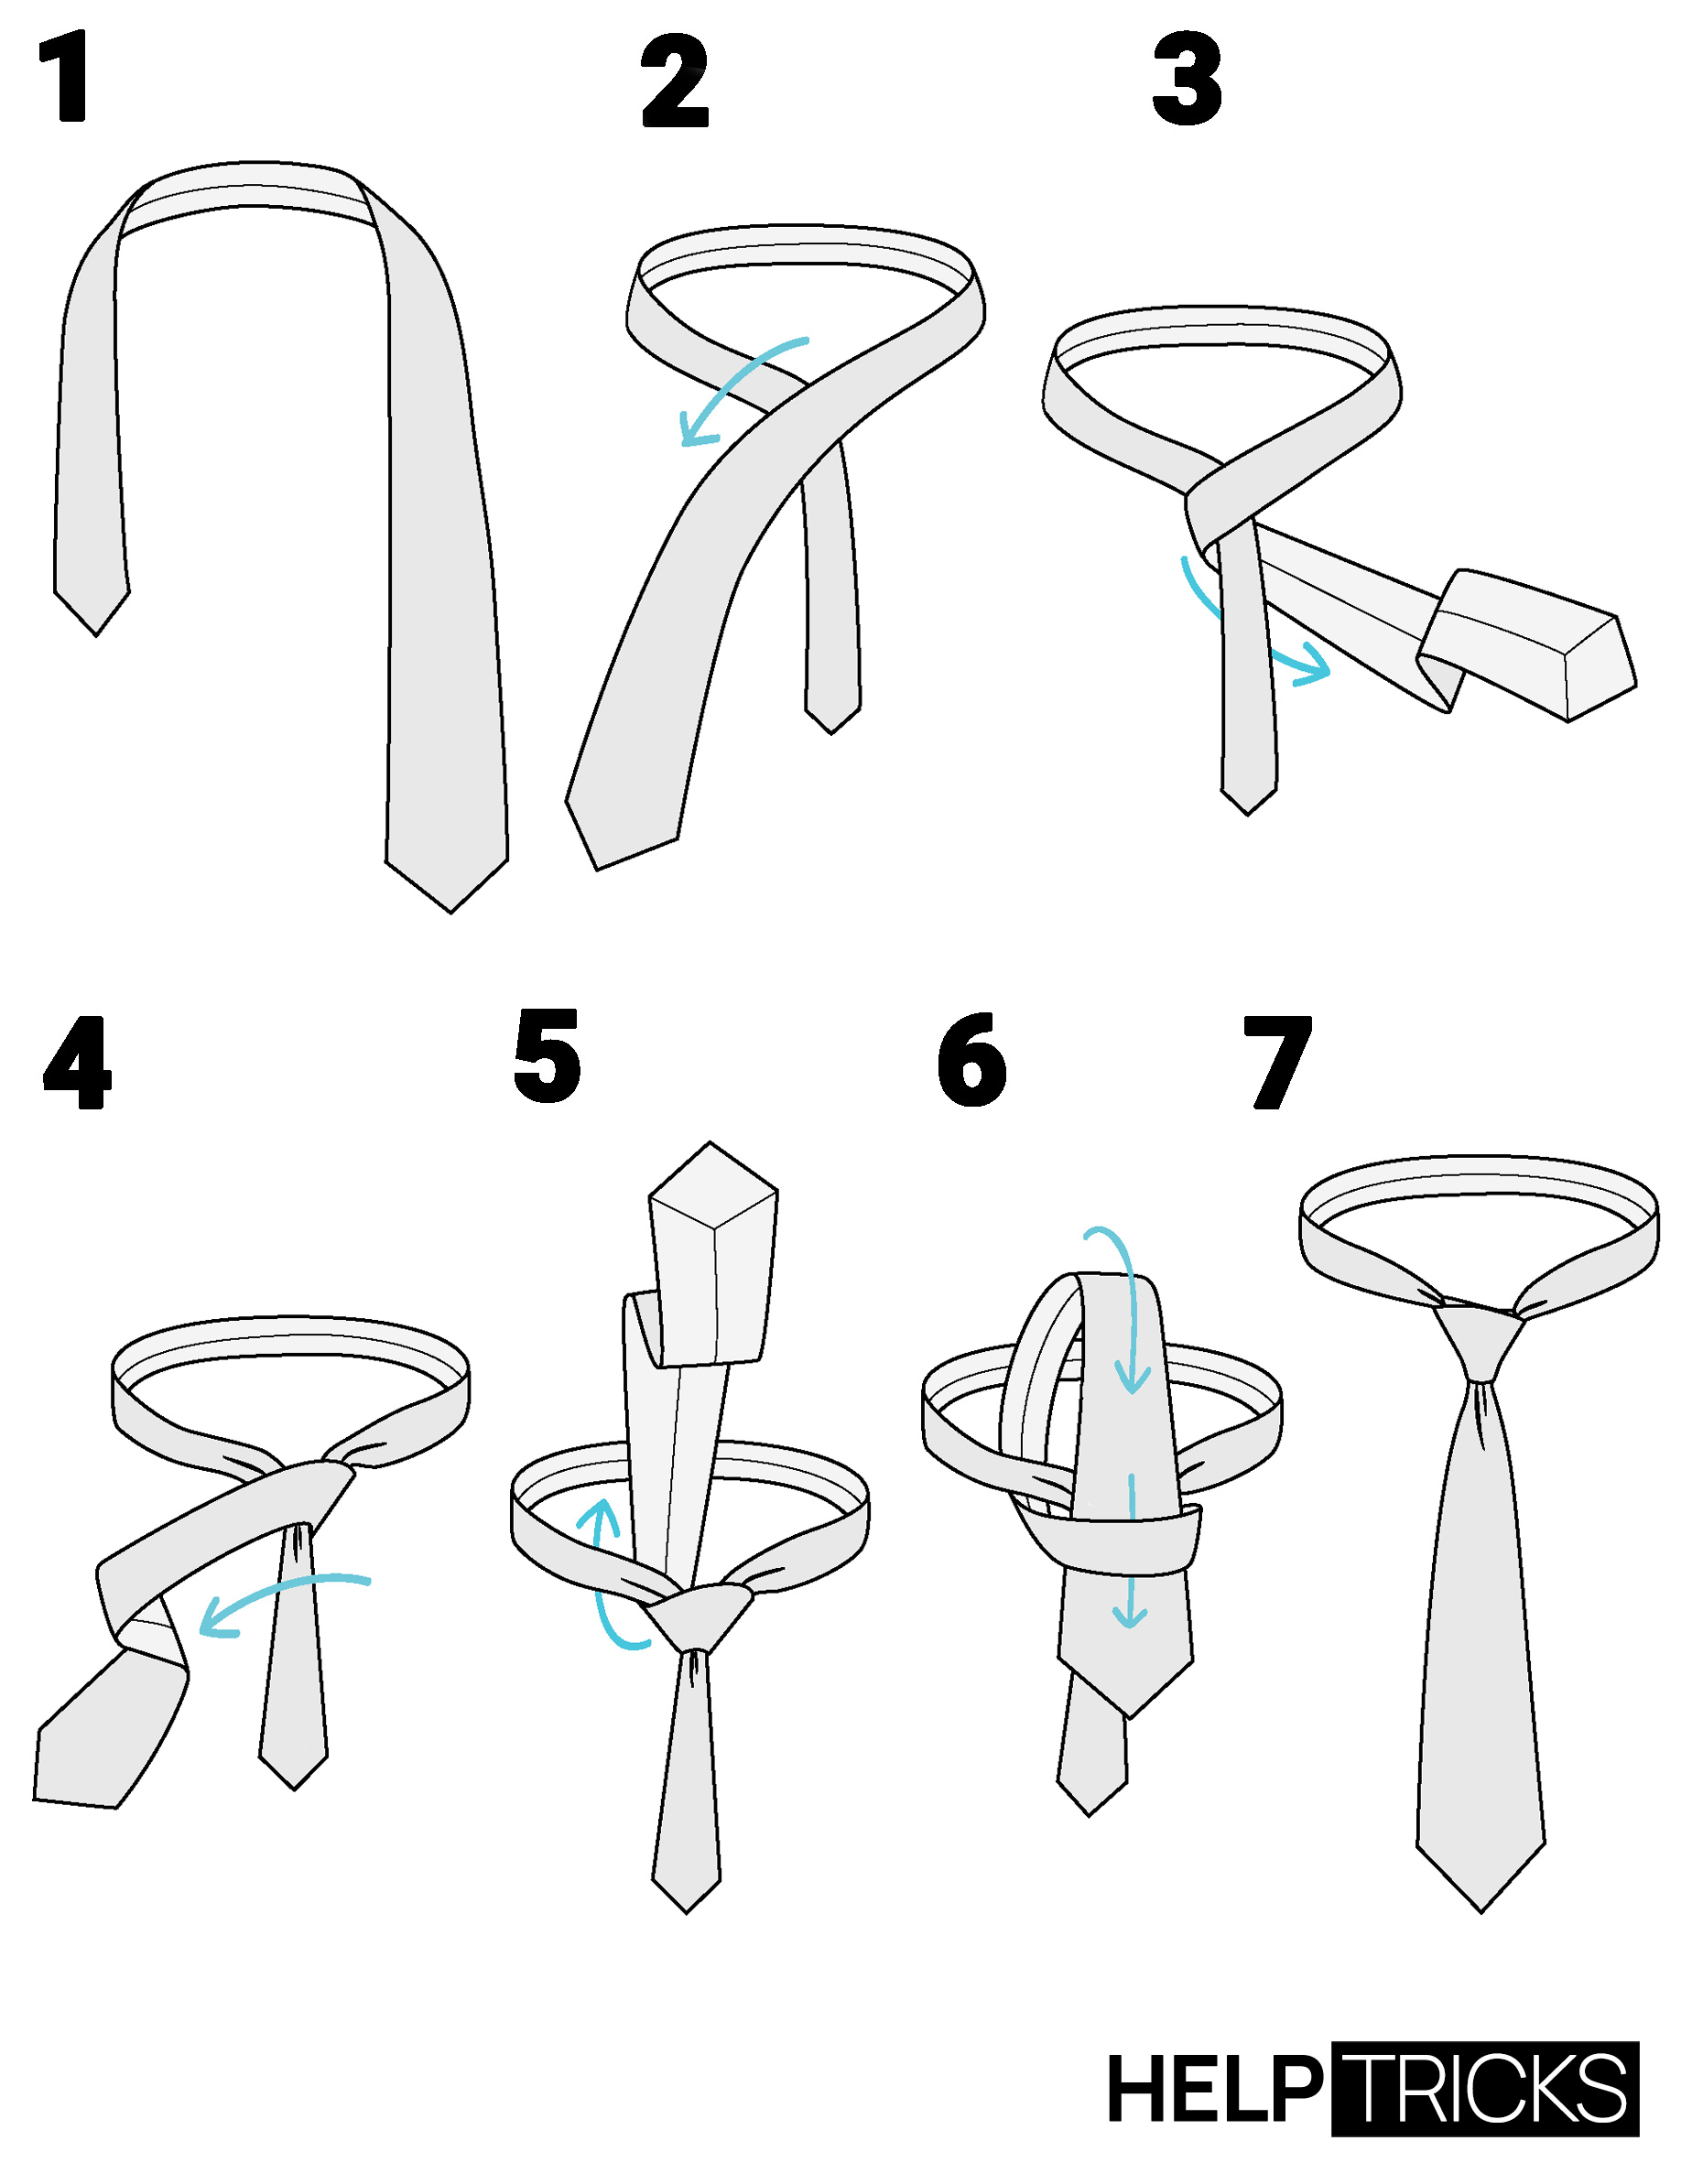
Full Windsor Knot
This is a bit tricky.
Drape the tie around the collar and leave the thick end hanging on the right beneath 4 / 6 inches down the waistband.
Cross the thick end horizontally in an ‘X’ shape in front of the narrow end.
Put the thick end up and take it out from the top and put it behind the narrow end again.
Put the thick end up in front of the knot and take it out from the left side and put it horizontally in front of the knot from left to right.
Place a finger on that loop and bring the thick end underneath that loop around the collar. The tip should face upwards.
Hold the thick end and bring it downwards through the loop you’ve been holding and make a knot. Smoothen the knot evenly with your hands and adjust it.
Full Windsor Knot or the Double Windsor requires rather a long tie than other knots and looks pretty neat on a suit.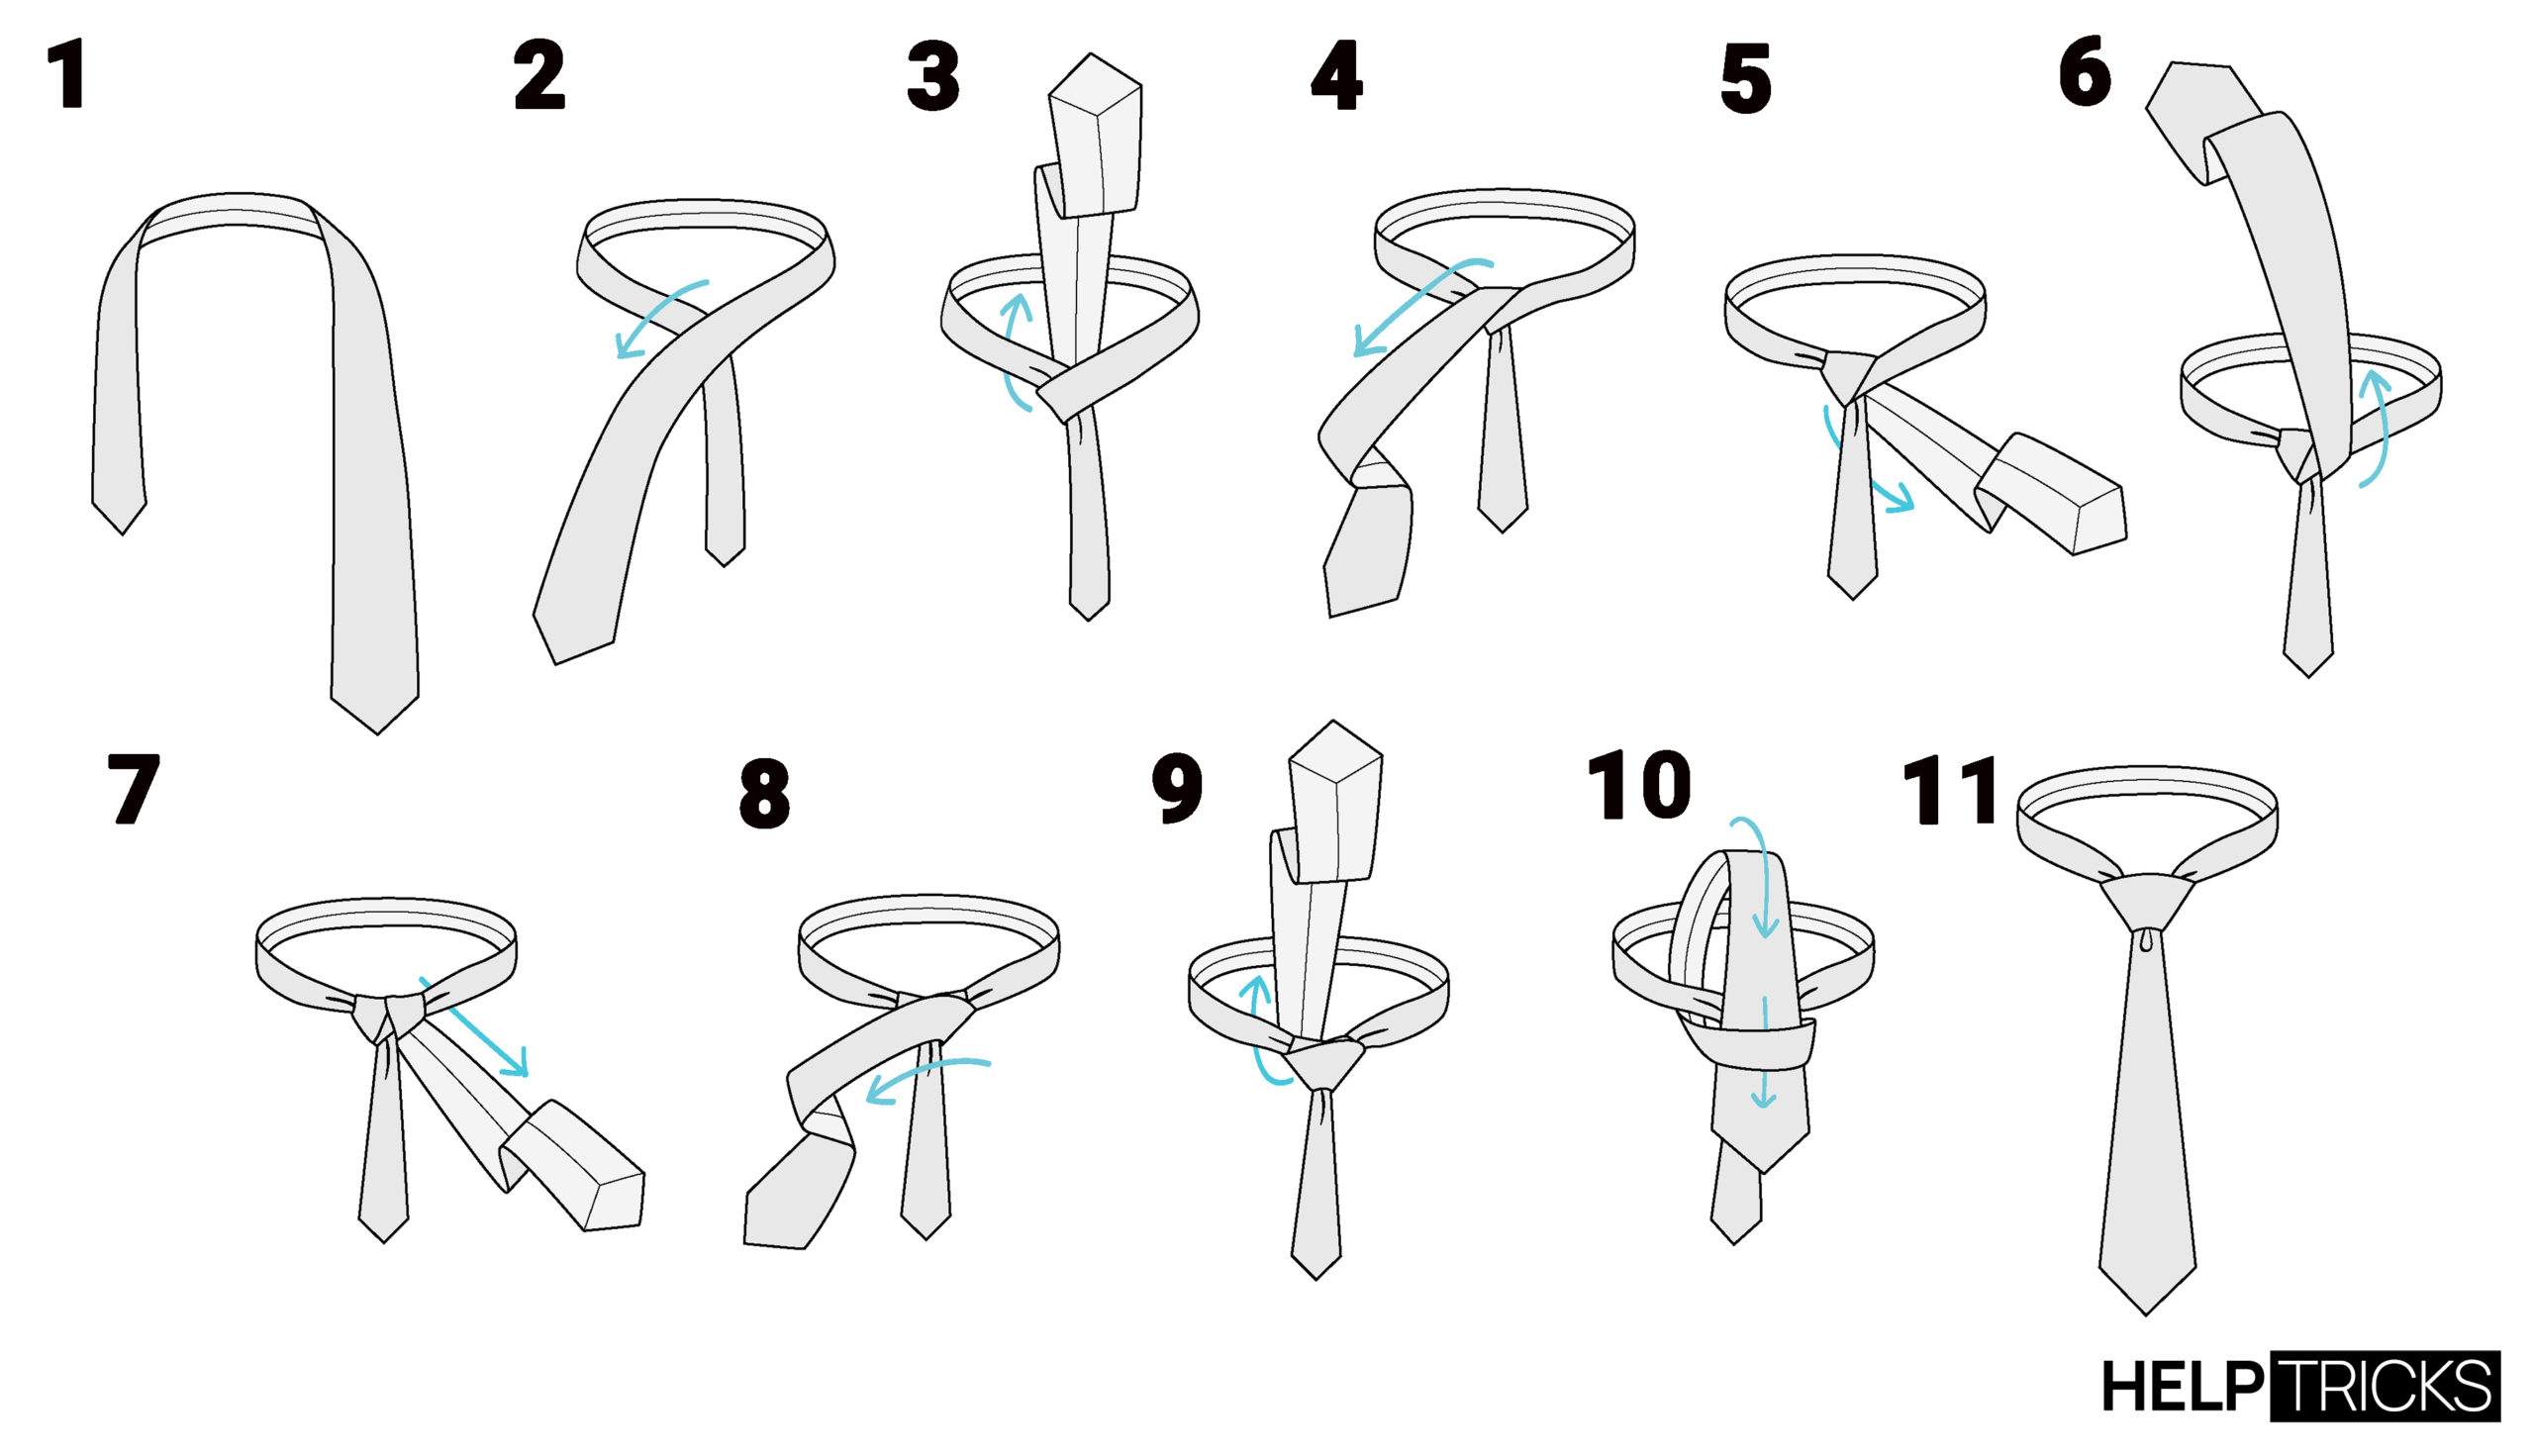
Bow Tie Knot
Wrap the bow tie around the collar with one end longer than the other. The right end should be placed over the left end in an ‘X’ shape.
Make a loop with the longer end behind the ‘X’. Keep the long end aside.
Place your index finger on the widest part of the curve on the short end and fold creating a bow shape. Keep it closer to the neck as possible.
Put the long end back from in front of the middle of the bow shape and bring it down to make a nice bow shape.
Then fold the long end to make a wing and tuck it through the loop you’ve made. Make the wings symmetrical.
And when you are done with the final adjustments, you have a fine bow tie ready to come with you!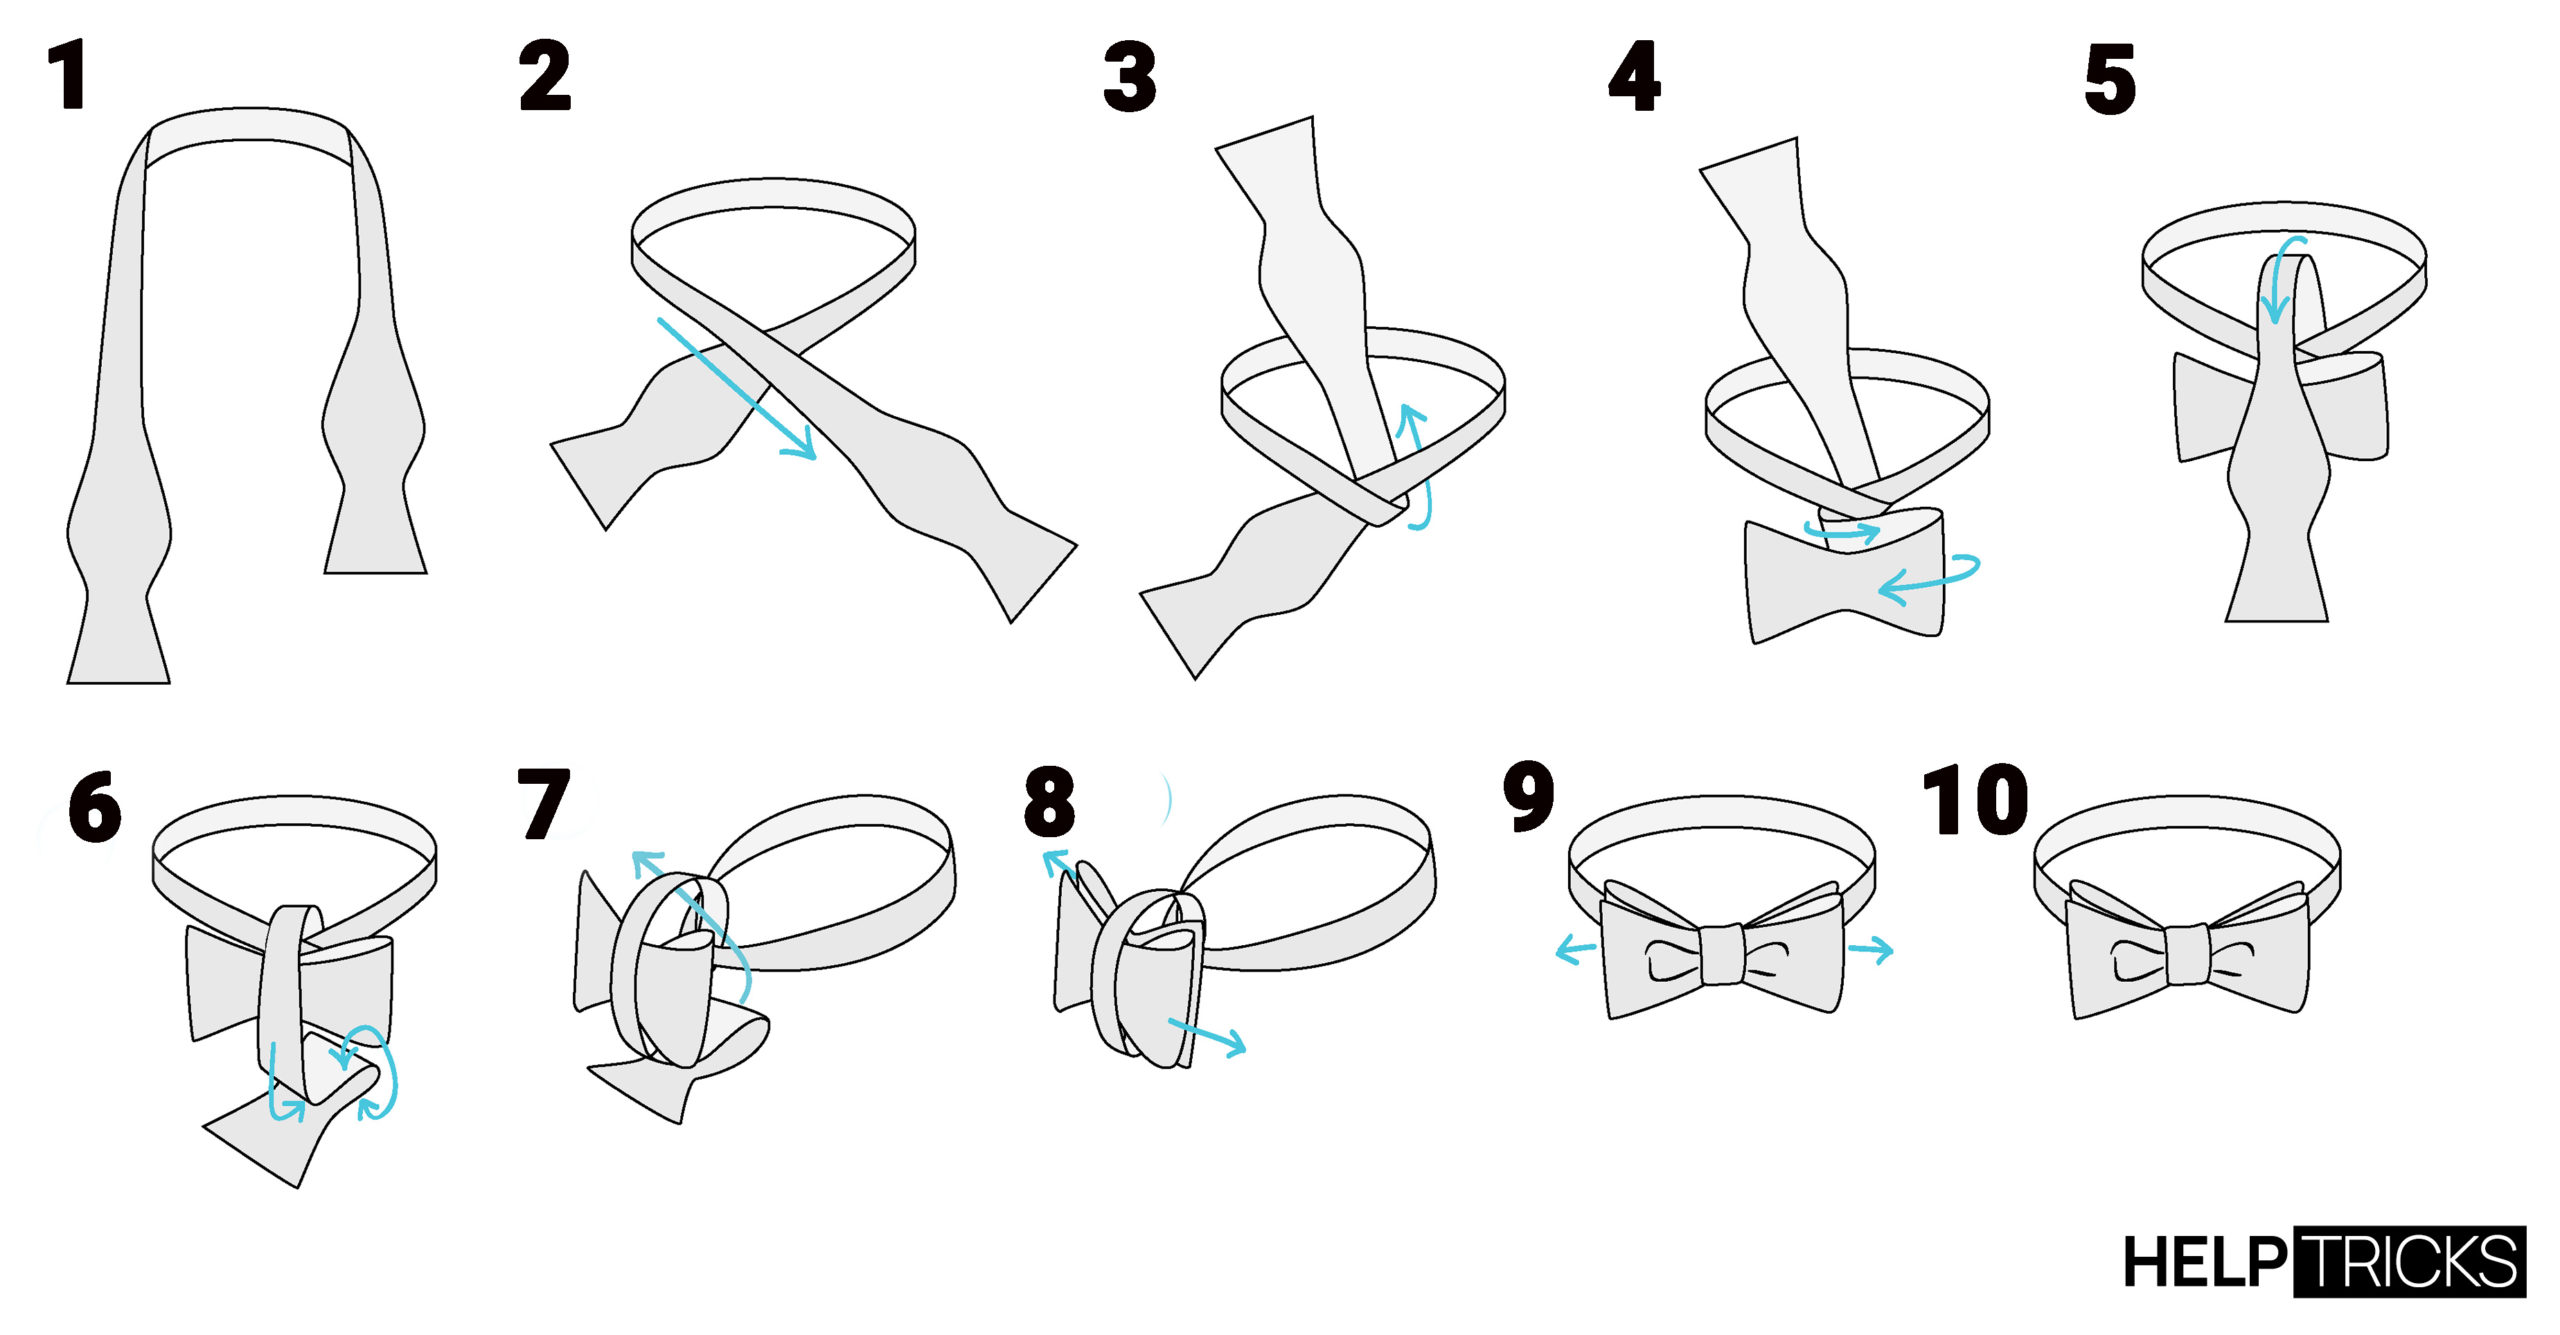
Pratt Knot
Wrap the tie around the collar, seam outwards, thick end to the left and 1-2 inches lower than the preferred finishing spot.
Cross the thick end under the narrow end to form an ‘X’ shape and pass it through the loop.
Put the thick end horizontally in front of the knot from right to left and put a finger to hold a loop.
Take the thick end from the back of the knot and put it through the loop creating the knot. You can adjust this by pulling on the narrow end as most of the other tie knots.
This is rather an easy knot.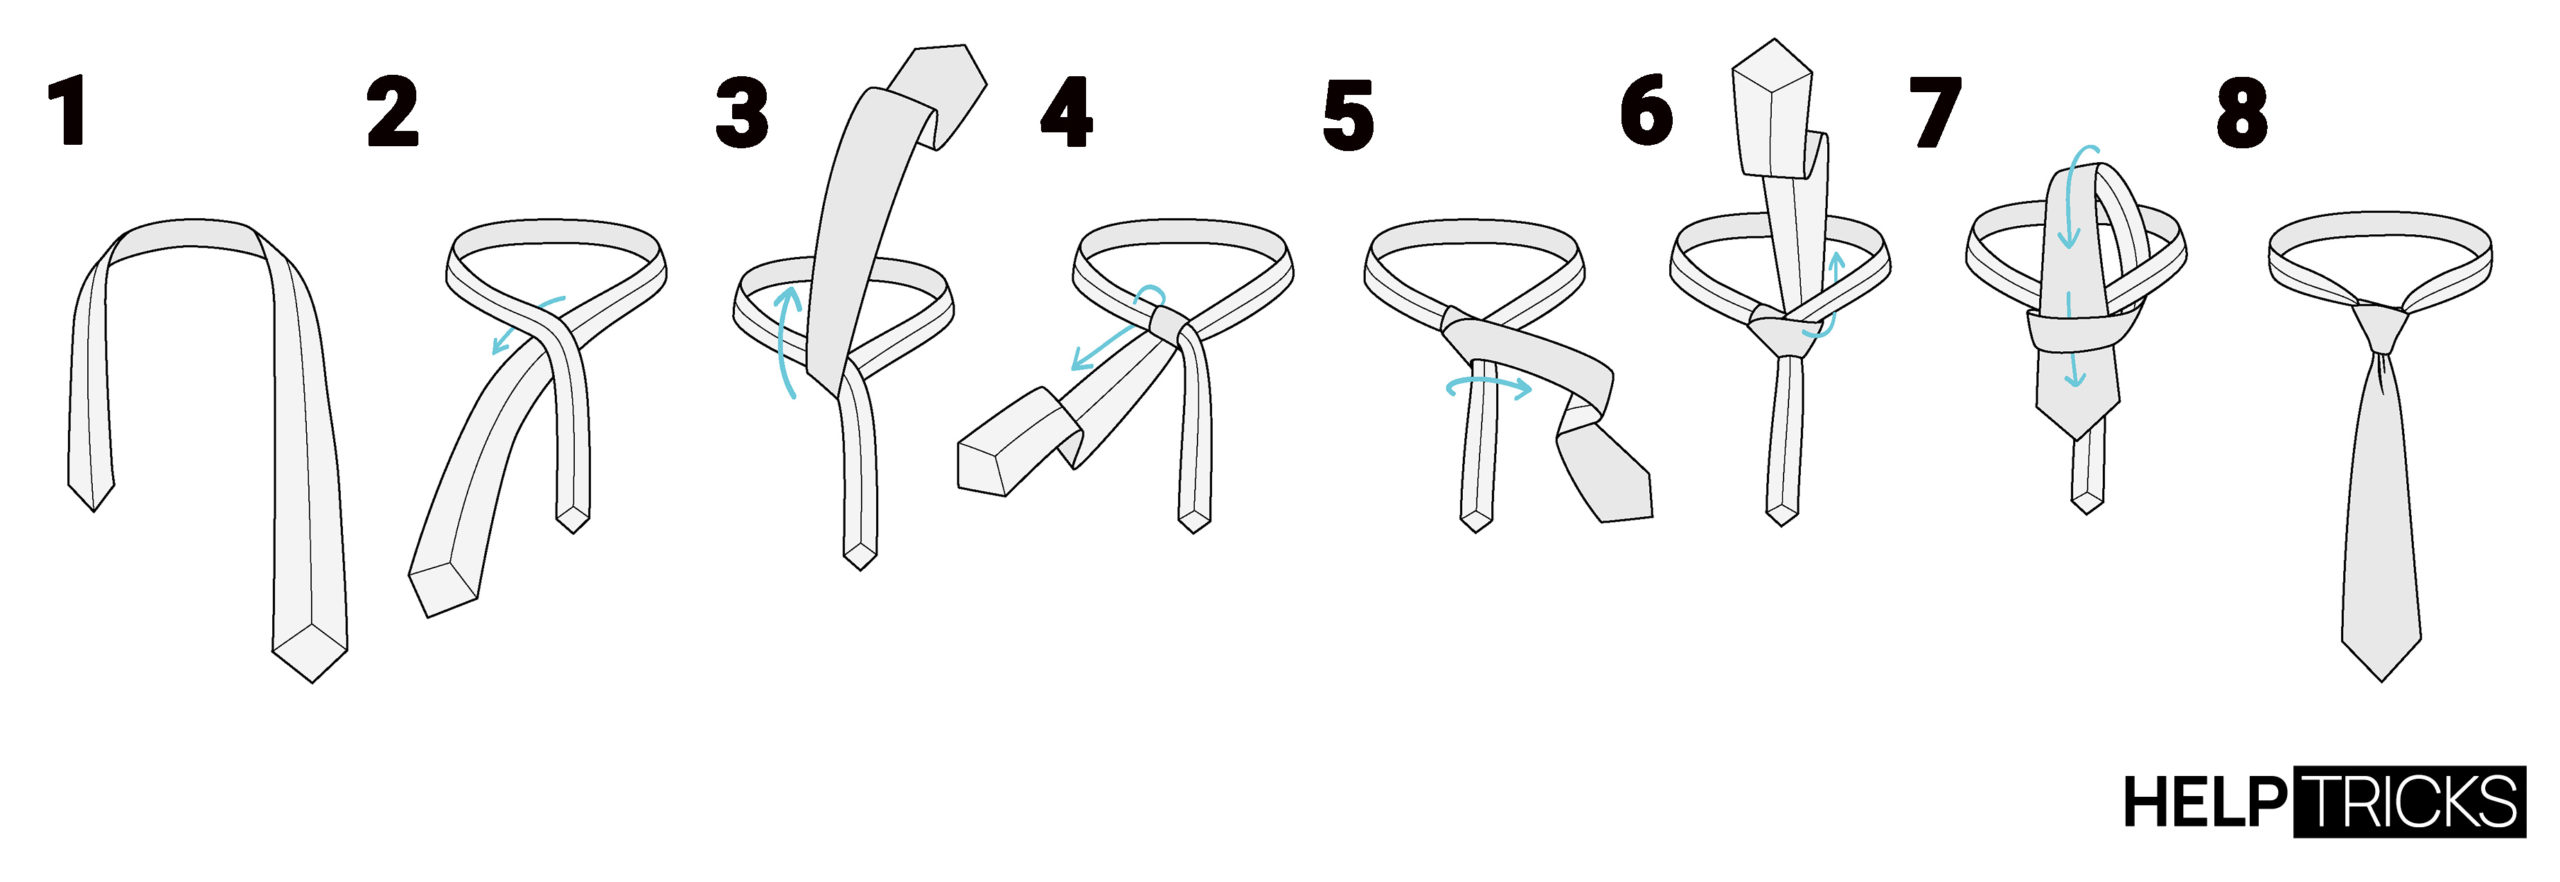
Now you know 5 of the many ways to tie a tie knot. And something is better than nothing!


1 Comment
Great content! Super high-quality! Keep it up! 🙂